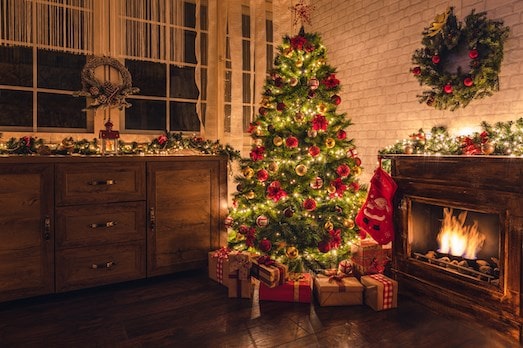
How To Decorate Your Christmas Tree
The Christmas season is officially upon us, which means it’s time to get out your Christmas tree and start decorating!
Not sure how? We’re here to help!
There are many ways to decorate your Christmas tree based on style, theme and look. But ultimately, creating a gorgeous tree comes down to two simple things: effective spacing and layering.
Tip: Try not to get too hung up on decorating details. Remember, accessorising your tree should be a fun family experience you enjoy doing together.
Before you begin, you should first ensure you have the right tree; one that’s durable and has enough space for all your decorations. If you’re not sure what Christmas tree is best for your home, check out our Christmas tree buying guide.
Step One: Gather Your Supplies
For convenience, it’s best to gather all your Christmas tree decorations before you begin. Getting your supplies together first will save you time and energy. Move your tree out of storage, your decorations and ornaments, as well as hooks, lights, and tree toppers.
Tip: While you’re gathering your supplies, it’s a good idea to also check your lights are working correctly.
Step Two: Arrange & Fluff
Once you’ve got all your materials, it’s time to get your tree out and prepped for the decorations. Fluff out the branches and arrange them by fanning them out to cover as much space as possible. While positioning the tree takes time – the look it creates is definitely worth doing.
Step Three: Pick A Theme
Decorations come in a wide variety of options, so it’s essential to have a style to avoid a clash.
Every Christmas tree should have the same theme running throughout its branches. For example, a traditional theme of red and green or a modern, simple style of white. If looking for matching ornaments seems like a daunting task, you can always buy decoration packs that come with complementing pieces.
Tip: remember to keep this theme going throughout the whole tree to create a stylish masterpiece.
Step Four: Add Your Lights
Always add lights to your tree first! It’s much easier to add your lights before your decorations, tree topper, and garlands than after.
To decorate with lights, start at the base and work your way up, wrapping the lights around the tree’s trunk as you go – this will add depth and dimension to the tree.
Ensure you space out the lights properly and weave them under and over branches until you reach the top.
Tip: You may need multiple sets of lights to cover the entire tree. As a general rule, it’s 100 lights per one foot of a tree, so for a seven-foot Christmas tree, you may need around 700 lights.
Once you’ve reached the top with your lights, weave them back down along different branches to bring your tree to life.
Tip: Make sure you remember to hide the light’s wires as much as possible for a clean, sophisticated look.

Step Five: Add Decorations
Once you’re happy with the placement of your lights, you can start adding your decorations!
The easiest way to style your decorations is to divide the tree into sections: top, middle, and bottom. Begin at the top and work your way down, always ensuring the decorations are balanced and spaced out naturally.
Add the largest decorations first, remembering to add some deep in the tree for depth, then medium and small. Don’t forget to place all your favourite ornaments in dominant spaces so you can admire them all December long!
If you want your tree to look full, then you should consider clustering some of your baubles together – bundling different sized baubles together can really elevate the look of your tree.
Tip: Don’t forget to consider the type of decorations your using – if you have little kids, all your delicate decorations should be placed well out of reach.
Step Six: Fill Empty Space
To make your Christmas tree really pop, you’ll need to add more decorations than just baubles.
Tree picks are a fantastic addition to any tree. These decorative branches can add depth and a different element to make your tree stand out.
Garlands and ribbons also look stunning wrapped around your tree and are a perfect way to fill any empty space.
Step Seven: Add A Tree Topper
With the decorations done, it’s time to complete the look and add that wow factor with a stunning tree topper. Choose one that suits your decorative theme – you could add a bow, star, or angel – it’s entirely up to you.
Step Eight: Adding A Tree Skirt
Don’t forget to dress up the base of your tree and hide those ugly poles with a tree skirt. It’s the perfect place to store presents and complete the look of your tree.